
Homebridge Broadlink RM
Introduction
Welcome to the Broadlink RM Mini and Broadlink RM Pro plugin for Homebridge.
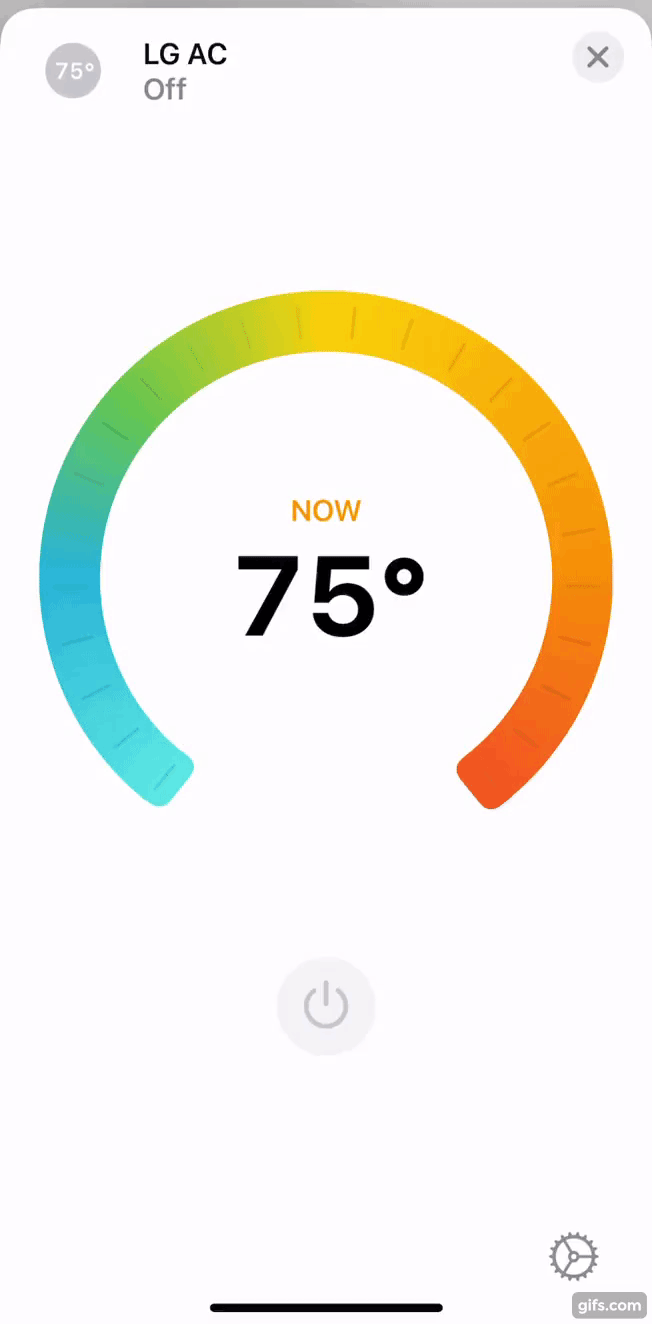
This plugin allows you to control your RM Mini and RM Pro with HomeKit using the Home app and Siri.
Why the name? - Obviously homebridge-broadlink-rm comes from the first plugin which @lprhodes created. Soon after that a fork added the "air-conditioner-pro" accessory allowing different hex codes for each AC function, but support dropped - and I can't find a source now. This fork started by merging the "air-conditioner-pro" features into the original plugin. Since then we've also added "tv" support thanks to @AlexanderBabel, then more recently updated to add support for the newer RM4 devices.
Like this plugin?
If you like this plugin and want to show your support then please star the Github repo, or better yet; buy me a drink using Paypal.
Thank you to all those that make contributions to the Homebridge community (through support, code, and financial)!
Requirements
- Requires Node.js >= 7.6.0
- If you're seeing something like
ERROR LOADING PLUGIN"..."async setCharacteristicValue (props, value, callback) {then please check your node version before creating a new issue:node -v. - Broadlink will now, by default, lock your device when it is configured so that it cannot be reached by local
devices.
This will prevent this plug-in from discovering or connecting to the device. To unlock either abort the setup
process
when you're prompted for a room, or follow these steps:
- Open the Broadlink app
- From the Home screen, tap on your Broadlink device
- Tap the ... in the top right
- Scroll down and toggle "Lock device" to Off
- Tap OK when prompted "Confirm to unlock the device"
Installation
Example BroadlinkRM platform in the homebridge configuration:
  ...
  "platforms": [
    {
      "platform":"BroadlinkRM",
      "name":"Broadlink RM",
      "accessories":[
        {
          "name":"TV On/Off",
          "type":"switch",
          "data":{
            "on":"2600500000012...",
            "off":"2600500000012..."
          }
        }
      ]
    }
  ]
  ...
- Install homebridge using the directions on the project page
- Install this plugin using:
npm install -g homebridge-broadlink-rm-pro - Update your homebridge
config.jsonfile. See config-sample.json for examples.
If you have trouble, check out the Troubleshooting section below. If you're still having trouble reach out the the community for help. I recommend either Reddit or GitHub are usually the best places.
Platform options
The following options are available at the platform level of the config.
| key | description | example | default | required |
|---|---|---|---|---|
platform |
Must be set to BroadlinkRM. | - | - | Yes |
name |
A friendly name for the platform to be used by Homebridge. | Broadlink RM | BroadlinkRM | No |
hideScanFrequencyButton |
If true, blocks the creation of the scan frequency accessory used to learn RF codes. | true | false | No |
hideLearnButton |
If true, blocks the creation of the Learn accessory used to learn IR codes. | true | false | No |
hideWelcomeMessage |
If true, stops the output/logging of the platform welcome message. | true | false | No |
isUnitTest |
Disables some ongoing functions for testing (pings, temperature). | true | false | No |
deviceDiscoveryTimeout |
The amount of time the network is scanned for devices when using automatic discovery. | 120 | 60 | No |
logLevel |
Adjusts the amount of detail logged for the platform and device. Accepted values (in order) are none, critical, error, warning, info, debug, trace. For more information see the logLevels notes. | debug | info | No |
hosts |
If configured automatic discovery of Broadlink devices is disabled and the provided devices are added. For more information see the Device Discovery notes. | Notes | - | No |
Advanced Setup
Multiple Broadlink RM Devices
If you have multiple Broadlink RM devices (e.g. one in the bedroom, one in the lounge) then you can
additionally specify the Broadlink RM's IP or MAC address in a "host" key/value pair
on each accessory so that the accessory will use the correct device to send the IR or RF commands.
If you wish to have multiple "Learn Code" accessories (e.g. for each device) then you can add
accessories with a type of learn-code and then specify "host" and
"name" key/value pairs.
Device Discovery
Include in the top of the platform config (not in any of the accessories).
...
"hosts": [
  {
    "address": "192.168.1.76",
    "mac": "34:ea:34:e7:d7:28",
    "isRFSupported": true,
    "isRM4": true
  }
],
...
Generally Broadlink RM devices should be detected automatically. I've resolved many issues related to this in recent releases however if your network doesn't support UDP for whatever reason then your device still won't be discovered.
To help combat this there's a "hosts" option that can be defined at the top level of
the plugin config.
This is considered advanced setup and should only be used if you experience issues with the automatic discovery. It will require a bit of investigation/troubleshooting to get the correct settings compatible with your device(s).
| key | description | example | default | required |
|---|---|---|---|---|
isRFSupported |
Forces the device to support RF signals. | true | false | No |
isRM4 |
Marks the device as a newer RM4 device and sends data with required new headers. | true | false | No |
Hex Codes
Learning IR and RF hex codes
Example "Learn IR" Logs
[Broadlink RM] Learn Code (ready)
[Broadlink RM] Learn Code (learned hex code: HEX_CODE)
[Broadlink RM] Learn Code (complete)
[Broadlink RM] Learn Code (stopped)
"Learn" and "Scan Frequency" accessories are automatically added to the Home app (so long as you've not added either manually in the config).
In the Home app, simply toggle the switch on, perform the IR or RF command in front of your Broadlink RM device and copy the HEX output from the homebridge log to wherever you want the code in the config.
The switch will toggle off automatically once the code has been received. You can optionally stop attempting to learn a code by toggling the switch off yourself.
Using Hex Codes
Hex code sent when an accessory is turned on, but not when it is turned off.
{
  ...
  "data": "ON_HEX_CODE"
  ...
}
Sometimes, specific keys may be required such as on, open, or lock.
{
  ...
  "data": {
    "on": "ON_HEX_CODE",
    "off": "OFF_HEX_CODE",
  }
  ...
}
Wherever you see the ability to use a hex code in the documentation, the value can be either a hex code or an Advanced Hex Structure.
Usually you will only need a hex code. Hex codes that are learned using the "Learn IR" and "Scan RF" switches.
Pronto IR Codes
The plugin supports the use of Pronto codes; you can put them wherever you would normally put a Broadlink RM
generated IR code. Pronto codes are automatically detected by their first 4 characters being 0 i.e.
0000.
Advanced Hex Structure
Hex objects allow multiple hex codes to be sent with "repeat",
"intervals" and "pause" options.
Repeat
Example
{
  ...
  "data": [
    {
      "data": "ON_HEX_CODE",
      "sendCount": 3,
      "interval": 0.3
    }
  ]
  ...
}
Result
Send "ON_HEX_CODE"
Wait 0.3 seconds
Send "ON_HEX_CODE"
Wait 0.3 seconds
Send "ON_HEX_CODE"
Hex codes can be repeated multiple times. A delay can be added between each send of the hex code by adding an
"interval" option.
Repeat On/Off
Example
{
  ...
  "data": {
    "on": "ON_HEX_CODE",
    "off": [
      {
        "data": "OFF_HEX_CODE",
        "sendCount": 3,
        "interval": 0.3
      }
    ]
  }
  ...
}
Result
Send "OFF_HEX_CODE"
Wait 0.3 seconds
Send "OFF_HEX_CODE"
Wait 0.3 seconds
Send "OFF_HEX_CODE"
You can also have separate "on" and "off" structures.
Multiple Hex Codes
Example
{
  ...
  "data": {
    "on": [
      {
        "data": "ON_HEX_CODE_1",
        "pause": 0.3
      },
      {
        "data": "ON_HEX_CODE_2",
        "pause": 0.3
      },
      {
        "data": "ON_HEX_CODE_3",
      }
    ],
    "off": "OFF_HEX"
  }
  ...
}
Result
Send "ON_HEX_CODE_1"
Wait 0.3 seconds
Send "ON_HEX_CODE_2"
Wait 0.3 seconds
Send "ON_HEX_CODE_3"
You may wish for different hex codes to be sent at once. A delay can be added between each hex code by adding a
"pause" option.
Multiple Codes & Repeats
Example
{
  ...
  "data": {
    "on": [
      {
        "data": "ON_HEX_CODE_1",
        "sendCount": 3,
        "interval": 0.1,
        "pause": 0.3
      },
      {
        "data": "ON_HEX_CODE_2",
        "pause": 0.3
      },
      {
        "data": "ON_HEX_CODE_3",
      }
    ],
    "off": "OFF_HEX"
  }
  ...
}
Result
Send "ON_HEX_CODE_1"
Wait 0.1 seconds
Send "ON_HEX_CODE_1"
Wait 0.1 seconds
Send "ON_HEX_CODE_1"
Wait 0.3 seconds
Send "ON_HEX_CODE_2"
Wait 0.3 seconds
Send "ON_HEX_CODE_3"
You may wish for different hex codes to be sent at once, with some repeating. A delay can be added between each
hex code by adding a "pause" option. A delay can be added between each repeats of the
same hex code by adding an "interval" option.
Common Accessory Options
The following options are common between each accessory:
| key | description | example | default | required |
|---|---|---|---|---|
name |
A descriptor for the accessory that will show in HomeKit apps. | "TV" | - | Yes |
type |
The type of accessory. | "switch" | - | Yes |
disabled |
Useful for when you want to keep the configuration of an accessory but not add it to HomeKit. | true | - | No |
persistState |
Determines whether the state of accessory persists after homebridge has been restarted. | false | true | No |
resendHexAfterReload |
When persistState is true (it is by default) this will resend the hex code for the last known state if homebridge is restarted. | true | false | No |
allowResend |
When true, hex codes will be sent even if the state is already set to the requested value. When false the hex code will not be resent. | false | true | No |
disableLogs |
Disables the log output for this accessory. This will set logLevel to none. |
true | false | No |
debug |
Outputs some additional logs, useful for figuring out issues. This will set logLevel to debug. |
true | false | No |
logLevel |
Adjusts the amount of detail logged for the accessory. Accepted values (in order) are
none, critical, error, warning, info, debug, trace. For more
information see the logLevels notes. |
debug | info | No |
host |
The IP or MAC address of the Broadlink RM device. | 192.168.1.32 | (auto-discovered) | No |
logLevels
logLevel has been added to allow more control of the outputs this plugin writes to the logs. The logLevel defined at each accessory
applies only to that accessory. logLevel defined at the platform level applies to the broadlink devices and the base platform. For example, if you'd
like to see the payloads sent to the devices, adjust at the platform; To see the commands an accessory sends, adjust the accessory. The exception to
this is Learn accessories which will apply their logLevel to the device during a learn operation.
| level | description | int value |
|---|---|---|
none |
Nothing will be logged. Specifies that a logging category should not write any messages. | 6 |
critical |
Logs that describe an unrecoverable application or system crash, or a catastrophic failure that requires immediate attention. | 5 |
error |
Critial errors and logs that highlight when the current flow of execution is stopped due to a failure. These should indicate a failure in the current activity, not an application-wide failure. | 4 |
warning |
All errors above, and logs that highlight an abnormal or unexpected event in the application flow, but do not otherwise cause the application execution to stop. | 3 |
info |
All errors and warnings will be logged, along with Logs that track the general flow of the application. These logs should have long-term value. This should include status changes. | 2 |
debug |
All information above as well as logs that are used for interactive investigation during development. These logs should primarily contain information useful for debugging and have no long-term value. This includes status queries and changes. | 1 |
trace |
Logs that contain the most detailed messages. All outputs available will be logged. | 0 |
Accessories
switch
Example
{
        ...
        "name": "Example Switch",
        "type": "switch",
        "data": {
          "on": "ON_HEX_CODE",
          "off":"OFF_HEX_CODE"
        }
        ...
      }
Turn the switch on and the on hex code is sent, turn it off and the off hex code is
sent.
| key | description | example | default | required |
|---|---|---|---|---|
data |
Hex data stored as a key-value JSON object. | See below. | - | Yes |
enableAutoOff |
Turn the switch off automatically when onDuration has been reached. |
true | false | No |
onDuration |
The amount of time before the switch automatically turns itself off (used in conjunction with
enableAutoOff).
|
5 | 60 | No |
enableAutoOn |
Turn the switch on automatically when offDuration has been reached |
false | true | No |
offDuration |
The amount of time before the switch automatically turns itself on (used in conjunction with
enableAutoOn).
|
5 | 60 | No |
pingIPAddress |
When an IP address is provided, it is pinged every second. If a response is received then the switch turns on, otherwise it turns off. | "192.167.1.77" | - | No |
pingUseArp |
When set ARP lookups are used to validate the device's status instead of an ICMP ping. | true | false | No |
pingIPAddressStateOnly |
Using this option will prevent the hex code from being sent when the state changes | true | false | No |
pingFrequency |
The frequency in seconds that the IP address should be pinged | 5 | 1 | No |
pingGrace |
Pauses ping status changes for the specified period (seconds) to allow device to start-up/shutdown after the change | 15 | 10 | No |
stateless |
If true, the switch will always revert to an "Off" state. | true | false | No |
"data" k/ey-value object
| key | description |
|---|---|
on |
A hex code string or object to be sent when the switch is changed to the on position. |
off |
A hex code string or object to be sent when the switch is changed to the off position. |
outlet
Example
{
      ...
      "name": "Example Outlet",
      "type": "outlet",
      "data": {
        "on": "ON_HEX_CODE",
        "off":"OFF_HEX_CODE"
      }
      ...
    }
Turn the outlet on and the on hex code is sent, turn it off and the off hex code is
sent.
| key | description | example | default | required |
|---|---|---|---|---|
data |
Hex data stored as a key-value JSON object. | See below. | - | Yes |
enableAutoOff |
Turn the outlet off automatically when onDuration has been reached. |
true | false | No |
onDuration |
The amount of time before the outlet automatically turns itself off (used in conjunction with
enableAutoOff).
|
5 | 60 | No |
enableAutoOn |
Turn the outlet on automatically when offDuration has been reached |
false | true | No |
offDuration |
The amount of time before the outlet automatically turns itself on (used in conjunction with
enableAutoOn).
|
5 | 60 | No |
pingIPAddress |
When an IP address is provided, it is pinged every second. If a response is received then the outlet's "Outlet In Use" shows as "Yes", otherwise it shows as "No". | "192.167.1.77" | - | No |
pingUseArp |
When set ARP lookups are used to validate the device's status instead of an ICMP ping. | true | false | No |
pingIPAddressStateOnly |
Using this option will prevent the hex code from being sent when the state changes | true | false | No |
pingFrequency |
The frequency in seconds that the IP address should be pinged | 5 | 1 | No |
pingGrace |
Pauses ping status changes for the specified period (seconds) to allow device to start-up/shutdown after the change | 15 | 10 | No |
"data" key-value object
| key | description |
|---|---|
on |
A hex code string or object to be sent when the plug is changed to the on position. |
off |
A hex code string or object to be sent when the plug is changed to the off position. |
fan
Example
{
      ...
      "name": "Example Fan",
      "type": "fan",
      "data": {
        "on": "ON_HEX_CODE",
        "off":"OFF_HEX_CODE",
        "clockwise":"CLOCKWISE_HEX_CODE",
        "counterClockwise":"COUNTERCLOCKWISE_HEX_CODE",
        "swingToggle":"SWING_HEX_CODE",
        "fanSpeed20":"FAN20_HEX_CODE",
        "fanSpeed60":"FAN60_HEX_CODE",
        "fanSpeed100":"FAN100_HEX_CODE"
      }
      ...
    }
Turn the fan on and the on hex code is sent, turn it off and the off hex code is
sent.
Additionally, Siri supports the toggling of the swing mode and setting of the fan speed as a %.
If you don't specify every fan speed then the accessory will choose the hex code of the fan speed closest to the one requested. e.g. If you only specify fan speeds of 10%, 50% and 100% then ask "Set Fan to 40%" then the hex code for 50% will be used.
There is also a type "fanv1" which is the older HomeKit fan. This type doesn't support
swingMode but HomeKit gives more icon options.
| key | description | example | default | required |
|---|---|---|---|---|
data |
Hex data stored as a key-value JSON object. | See below. | - | Yes |
hideSwingMode |
Determines whether we should hide the swing mode UI or not. | true | false | No |
hideRotationDirection |
Determines whether we should hide the rotation direction UI or not. | true | false | No |
alwaysResetToDefaults |
If set, the fanSpeed is reset to its default when the fan is turned off. | true | false | No |
defaultFanSpeed |
Sets the default Speed for the fan when a value isn't already set. | 50 | 100 | No |
stepSize |
If set, sets the amount the fanSpeed will step up/down by. | 10 | 1 | No |
speedCycle |
Determines whether we should cycle the speeds or not. | true | false | No |
defaultSpeedStep |
If set, sets the default speed for the fan when speedSteps is set and a value isn't already set. |
1 | - | No |
speedSteps |
If set, sets the amount the fanSpeed will step up/down by. | 3 | - | No |
"data" key-value object
| key | description |
|---|---|
on |
A hex code string or object to be sent when the switch is changed to the on position. |
off |
A hex code string or object to be sent when the switch is changed to the off position. |
clockwise |
A hex code string or object to be sent to make the fan go clockwise. |
counterClockwise |
A hex code string or object to be sent to make the fan go counter clockwise. |
swingToggle |
A hex code string or object used to toggle the swing mode on/off.
Not supported when using "type": "fanv1"
|
fanSpeedX |
A hex code string or object where X is any fan speed you wish to support e.g. "fanSpeed100". |
light
Example
{
      ...
      "name": "Example Light",
      "type": "light",
      "data": {
        "on": "ON_HEX_CODE",
        "off":"OFF_HEX_CODE",
        "brightness20":"BRIGHTNESS20_HEX_CODE",
        "brightness60":"BRIGHTNESS60_HEX_CODE",
        "brightness100":"BRIGHTNESS100_HEX_CODE",
        "hue20":"HUE20_HEX_CODE",
        "hue60":"HUE60_HEX_CODE",
        "hue100":"HUE100_HEX_CODE",
        "white":"WHITE_HEX_CODE"
      }
      ...
    }
Turn the light on and the defaultBrightness is set unless useLastKnownBrightness is
set to true in which case the last brightness that was set will be used.
Turn the light off and the off hex code is sent.
If you don't specify every brightness then the accessory will choose the hex code of the brightness closest to the one requested. e.g. If you only specify brightness values of 10%, 50% and 100% then ask "Set light to 40%" then the hex code for 50% will be used.
| key | description | example | default | required |
|---|---|---|---|---|
data |
Hex data stored as a key-value JSON object. | See below. | - | Yes |
defaultBrightness |
The default brightness to be set when you turn the light on. | 70 | 100 | Yes |
useLastKnownBrightness |
The last known brightness will be used instead of the defaultBrightness when turning a light back on. | false | true | No |
onDelay |
If the on hex data is specified in the data value, this will determine the
seconds between when the on code and the requested brightness code are sent. |
1 | 0.1 | No |
enableAutoOff |
Turn the light off automatically when onDuration has been reached. |
true | false | No |
onDuration |
The amount of time before the switch automatically turns itself off (used in conjunction with
enableAutoOff).
|
5 | 60 | No |
enableAutoOn |
Turn the light on automatically when offDuration has been reached |
false | true | No |
offDuration |
The amount of time before the switch automatically turns itself on (used in conjunction with
enableAutoOn).
|
5 | 60 | No |
exclusives |
Light accessories listed in this string array will be turned off when this accessory is turned on. | ["nightlight"] | null | No |
"data" key-value object
| key | description |
|---|---|
off |
A hex code string or object to be sent when the switch is changed to the off position. |
brightnessX |
A hex code string or object where X is any brightness you wish to support e.g. "brightness100". |
hueX |
A hex code string or object where X is any hue you wish to support between 0 and 359 e.g. "hue42". |
white |
A hex code string or object to set the light's colout to white |
on |
If set, this hex code shall be sent before brightness or hue is set using onDelay to create
a delay between sends. |
garage-door-opener
Example
{
      ...
      "name": "Example Garage Door",
      "type": "garage-door-opener",
      "openCloseDuration": 8,
      "data": {
        "open": "OPEN_HEX_CODE",
        "close":"CLOSE_HEX_CODE",
        "lock":"LOCK_HEX_CODE",
        "unlock":"UNLOCK_HEX_CODE"
        }
      ...
    }
Set the switch to open and the open hex code is sent, set it to close and the close
hex code is sent.
| key | description | example | default | required |
|---|---|---|---|---|
data |
Hex data stored as a key-value JSON object. | See below. | - | Yes |
openCloseDuration |
The amount of time in seconds that the accessory will show as "Opening" and "Closing" | 10 | 8 | No |
openDuration |
The amount of time in seconds that the accessory will show as "Opening" | 10 | 8 | No |
closeDuration |
The amount of time in seconds that the accessory will show as "Closing" | 10 | 8 | No |
autoCloseDelay |
The amount of time in seconds that the accessory will wait before automatically initiating the "Closing" state. | 10 | 30 | Yes |
"data" key-value object
| key | description |
|---|---|
open |
A hex code string or object to be sent when the switch is changed to the open position. |
close |
A hex code string or object to be sent when the switch is changed to the close position. |
unlock |
A hex code string or object to be sent when the switch is set to unlock. |
lock |
A hex code string or object to be sent when the switch is set to lock. |
lock
Example
{
      ...
      "name": "Example Lock",
      "type": "lock",
      "data": {
        "lock":"LOCK_HEX_CODE",
        "unlock":"UNLOCK_HEX_CODE"
        }
      ...
    }
Set the switch to unlock and the unlock hex code is sent, set it to lock and the lock
hex code is sent.
| key | description | example | default | required |
|---|---|---|---|---|
data |
Hex data stored as a key-value JSON object. | See below. | - | Yes |
autoLockDelay |
The amount of time in seconds that the accessory will wait before automatically initiating the "Lock" state. | 10 | 30 | No |
lockDuration |
The amount of time in seconds that the accessory will show a status of "Locking" for. | 2 | 1 | No |
unlockDuration |
The amount of time in seconds that the accessory will show a status of "Unlocking" for. | 2 | 1 | No |
"data" key-value object
| key | description |
|---|---|
unlock |
A hex code string or object to be sent when the switch is set to unlock. |
lock |
A hex code string or object to be sent when the switch is set to lock. |
window-covering
Example
{
      ...
      "name": "Example Blinds",
      "type": "window-covering",
      "totalDurationOpen": 45,
      "totalDurationClose": 40,
      "data": {
        "open": "OPEN_HEX_CODE",
        "close":"CLOSE_HEX_CODE",
        "stop":"STOP_HEX_CODE"
        }
      ...
    }
The window-covering accessory designed to be used by IR/RF controlled blinds/shades/shutters.
The accessory will determine how long the window-covering should continue opening/closing for based on the
previous position and target position along with the totalDurationOpen and
totalDurationClose values.
The window-covering will first send the open/close hex code, wait for
the calculated amount of time as explained above, then send the stop hex code. Concurrently, the %
shown in the Home app will be updated at intervals.
| key | description | example | default | required |
|---|---|---|---|---|
data |
Hex data stored as a key-value JSON object. | See below. | - | Yes |
totalDurationOpen |
The amount of time in seconds it takes to open the window-covering completely. | 30 | - | Yes |
totalDurationClose |
The amount of time in seconds it takes to close the window-covering completely. The value shall be used
to determine what percentage to show in the Home app as well as when to send the stop code.
|
30 | - | Yes |
initialDelay |
This allows multiple window-covering accessories to be updated at the same time without
RF/IR interference from one-another by adding an offset to each window-covering accessory
|
1 | 0.1 | No |
sendStopAt0 |
Determines where the stop command is sent when the blind position reaches 0% | true | false | No |
sendStopAt100 |
Determines where the stop command is sent when the blind position reaches 100% | true | false | No |
"data" key-value object
| key | description |
|---|---|
open |
A hex code string or object to be sent when the window-covering is requested to open. |
close |
A hex code string or object to be sent when the window-covering is requested to close. |
stop |
A hex code string or object to be sent when the window-covering is stopped automatically. |
openCompletely |
When set, this hex code will be sent when a value of 100% is requested. |
closeCompletely |
When set, this hex code will be sent when a value of 0% is requested. |
air-conditioner
Example
{
      ...
      "name": "Example Air Conditioner",
      "type": "air-conditioner",
      "data": {
        "off":"OFF_HEX_CODE",
        "temperature30":"30_HEX_CODE",
        "temperature16":"16_HEX_CODE",
        ...
      }
      ...
    }
This allows you to send a hex code for any temperature that you've defined a hex code for. If you simply want to heat up or cool down a room (and not learn every single temperature code) you can just set hex codes for the lowest and highest temperatures and those will be used whatever temperature you request.
| key | description | example | default | required |
|---|---|---|---|---|
data |
Hex data stored as a key-value JSON object. | See below. | - | Yes |
minTemperature |
The minimum temperature you can set. This should be 10C or less. | 10 | -15 | No |
maxTemperature |
The maximum temperature you can set. | 28 | 50 | No |
temperatureDisplayUnits |
Specify Celsius or Fahrenheit. | F | C | No |
defaultCoolTemperature |
The temperature that will be requested when no hex code exists for the specified temperature. | 14 | 16 | No |
defaultHeatTemperature |
The temperature that will be requested when no hex code exists for the specified temperature. | 28 | 30 | No |
heatTemperature |
The temperature at which we change the UI to show that we're heating. Also used to determine whether
defaultCoolTemperature or defaultHeatTemperature is used when hex data for a
particular temperature is missing.
|
20 | 22 | No |
replaceAutoMode |
When we turn on the thermostat with Siri it sets the mode as auto, so we set the mode to
cool or heat instead depending on the value of this key.
|
"heat" | "cool" | No |
pseudoDeviceTemperature |
Some RM devices don't have a built in thermometer, when set this prevents the device thermometer from being accessed and shows the provided value instead. | 0 | 0 | No |
autoHeatTemperature |
When the temperature is below this value, the heat mode will be enabled. | 18 | - | No |
autoCoolTemperature |
When the temperature is above this value, the cool mode will enabled. | 27 | - | No |
minimumAutoOnOffDuration |
The minimum amount of time that the air-conditioner must remain on or off after having been automatically turned on or off. | 300 | 120 | No |
temperatureFilePath |
A path to a file containing a number that represents the current temperature reported to the accessory. | "/Users/username/HomeKit/temperature/" | - | No |
temperatureAdjustment |
The number of degrees that the reported temperature should be offset by. | 3 | 0 | No |
turnOnWhenOff |
If the air-con unit state is off then an on code shall be sent before sending the
temperature code. |
true | false | No |
preventResendHex |
Determines whether the temperature hex code should be resent when requesting the same temperature as the last requested temperature. | true | false | No |
autoSwitchName |
The name of an switch accessory that can be used to enable/disable the auto on/off functionality. To be
used in conjunction with autoHeatTemperature and autoCoolTemperature. |
"Air-Con Auto" | - | No |
enableAutoOff |
Turn the A.C. off automatically when onDuration has been reached. |
true | false | No |
onDuration |
The amount of time before the A.C. automatically turns itself off (used in conjunction with
enableAutoOff).
|
5 | 60 | No |
temperatureUpdateFrequency |
The frequency in seconds for which the temperature shall be requested. | 20 | 10 | No |
sendTemperatureOnlyWhenOff |
When set, this will prevent the air-conditioner from being turned when setting a temperature while the air-conditioner is off. | true | false | No |
ignoreTemperatureWhenOff |
When set, this will prevent the sending of temperature hex codes when the air-conditioner is off. | true | false | No |
w1DeviceID |
Updates device current temperature from a Raspberry Pi Wire-1 thermometers (i.e. ds18b20). Value is the Device ID. | 28-0321544e531ff | - | No |
heatOnly |
Forces the Aircon accessory to only operate in Heat mode. | true | false | No |
coolOnly |
Forces the Aircon accessory to only operate in Cool mode. | true | false | No |
noHumidity |
Removes Humidity information from the device. | true | false | No |
noHistory |
Removes the Eve temperature and humidity history service from this accessory. Refer to History notes. | true | false | No |
tempSourceUnits |
Set this to F if your temperature source (not Broadlink) uses fahrenheit. |
F | C | No |
tempStepSize |
Size of steps when adjusting the temperature | 1 | 0.5 | No |
mqtt temperature support
Example
{
      ...
      "mqttURL": "mqtt://192.168.1.77",
      "mqttTopic": [{
          "identifier":"temperature",
          "topic":"/myhome/groundfloor/livingroom/temperature"
        },{
          "identifier":"humidity",
          "topic":"/myhome/groundfloor/livingroom/humidity"
        },{
          "identifier":"battery",
          "topic":"/myhome/groundfloor/livingroom/battery"
        }]
      ...
    }
You may subscribe to an mqtt topic to receive temperaturee updates. To do so you must specify the following configuration options:
| key | description | example | required |
|---|---|---|---|
mqttURL |
The URL where the mqtt feed is. This must be prefixed with mqtt:// |
mqtt://192.168.1.77 | yes |
mqttTopic |
The topic where the applicable value can be found. This can be a single string to retreive a single
value,
or an object to recieve multiple values. When using multiple values, valid identifiers are
temperature,
humidity, and battery.
|
/myhome/groundfloor/livingroom/temperature | yes |
mqttUsername |
The username to access the mqtt feed. | mqttuser | no (But Recommended) |
mqttPassword |
The password to go with the supplied mqttUsername |
hunter2 | no (But Recommended) |
Eve History Notes
Air-Conditioner, and other temperature and humidity sensors, support Eve's history services using the module fakegato-history. Through the Eve Home app you should be able to see history of these readings. The module will take average readings over 10 minute periods so don't be alarmed if there's no data as soon as Homebridge starts - this is normal.
The module will also store its readings in your homebridge dir as 'RMPro_Accessory-Name_persist.json'. Feel free to view this file, but don't manually edit it 🤦♂️.

air-conditioner Notes
There looks to be a glitch in the Apple Home app in that nothing happens when setting the mode to Off when you've turned the thermostat on by setting a specific temperature. Siri and other HomeKit apps don't have the same glitch. As a work-around you can just select a different mode and then press Off. This only happens the first time after launching homebridge.
Adding autoHeatTemperature and autoCoolTemperature can help automatically maintain a
temperature. When the temperature falls below and hits above the autoHeatTemperature and
autoCoolTemperature temperatures the accessory will automatically set the temperature to whatever
the defaultHeatTemperature and defaultCoolTemperature is. The accessory will then keep
checking (every autoMinimumDuration seconds) and if the temperature changes to be between the
autoHeatTemperature and autoCoolTemperature temperatures then it will turn itself off.
Something to note however is that if you decide to set a new temperature when the accessory has automatically
turned itself on then it will still attempt to turn itself back off. To stop this automatic turn-off you can
turn off the accessory manually and then turn it back on manually. Bare in mind that while the Home app may say
22C, the temperature may actually be 22.4C and if the Home app says 23C then it may actually be 22.5C.
"data" key-value object
| key | description |
|---|---|
on |
An optional hex code to be used in conjunction with the turnOnWhenOff configuration. |
off |
A hex code string or object to be sent when the air conditioner is asked to be turned off. |
temperatureX |
Where X is any temperature you wish to support e.g. temperature30. See below. |
modeX |
A hex code string where X is any temperture, and mode is one of "heat","cool", or "auto". Hex code used
to set unit to the specified mode and temperature. heat30. See below. |
offDryMode |
A hex code string used to enable the Coil Dry feature on some AC units when turning the unit off. |
"temperatureX" and "modeX" key-value object
| key | description |
|---|---|
data |
Hex data stored as string. |
pseudo-mode (Optional) |
The mode we set when this hex is sent. i.e. heat, cool or auto.
For graphical purposes only (hence use of the term "pseudo"). By default this will use the
current temperature and the target temperature to determine whether to set the mode as heat
or cool. |
heatercooler
Example
{
      ...
      "name": "Example Heater Cooler",
      "type": "heater-cooler",
      "data": {
        "on":"ON_HEX_CODE",
        "off":"OFF_HEX_CODE"
        "temperatureCodes":{
          "16":"16_HEX_CODE",
          "24":"24_HEX_CODE",
          ...
          }
        }
      ...
    }
Complex Example
{
    ...
    "name": "Example Heater Cooler",
    "type": "heater-cooler",
    "minTemperature": 67,
    "maxTemperature": 80,
    "heatingThresholdTemperature": 68,
    "data": {
      "heat": {
      "on":"ON_HEX_CODE",
      "off":"OFF_HEX_CODE",
      "temperatureCodes":{
        "67": {
            "rotationSpeedX": {
              "swingDnd":"HEX_CODE",
              "swingToggle":"HEX_CODE"
            },
            "rotationSpeedY": {
              "swingDnd":"HEX_CODE",
              "swingToggle":"HEX_CODE"
            }
          },
          "68": {
            "rotationSpeedX": {
              "swingDnd":"HEX_CODE",
              "swingToggle":"HEX_CODE"
            },
            "rotationSpeedY": {
              "swingDnd":"HEX_CODE",
              "swingToggle":"HEX_CODE"
            }
          }
        }
      }
    }
  ...
  }
Implementation of heater cooler accessory specification as per Apple HAP. Heater cooler allows for better representation of standalone heaters and air-conditioners that support functions like oscillation and fan speed.
In addition to the fan speed and oscillation features, this accessory also supports temperature in both degree Celsius and Fahrenheit.
| key | description | example | default | required |
|---|---|---|---|---|
temperatureUnits |
Temperature units to parse the config file | F | C | No |
coolingThresholdTemperature |
Temperature to set the cooler to | 70 | 35 C | No |
heatingThresholdTemperature |
Temperature to set the heater to | 67 | 10 C | No |
minTemperature |
Minimum temperature that can be set on device | 65 | - | No |
maxTemperature |
Maximum temperature that can be set on device | 80 | - | No |
turnOnWhenOff |
If the unit state is off then an on code shall be sent before sending the
temperature code. On code is selected based on current Mode. |
true | false | No |
defaultRotationSpeed |
Default fan speed to set when turning on device | 50 | 100 | No |
tempStepSize |
Size of steps when adjusting the temperature | 1 | 0.5 | No |
fanStepSize |
Increments of fan speed | 25 | 1 | No |
data |
See below. | - | - | Yes |
temperatureAdjustment |
The number of degrees that the reported temperature should be offset by. | 3 | 0 | No |
temperatureUpdateFrequency |
The frequency in seconds for which the temperature shall be requested. | 20 | 10 | No |
defaultNowTemperature |
Some RM devices don't have a built in thermometer, when set this prevents the device thermometer
from being accessed and shows the provided value instead. This will be replaced by pseudoDeviceTemperature in future. |
22 | 0 | No |
w1DeviceID |
Updates device current temperature from a Raspberry Pi Wire-1 thermometers (i.e. ds18b20). Value is the Device ID. | 28-0321544e531ff | - | No |
temperatureFilePath |
A path to a file containing a number that represents the current temperature reported to the accessory. | "/Users/username/HomeKit/temperature/" | - | No |
mqttURL |
The URL to monitor for MQTT topics (below). Must be prefixed with mqtt://. Refer to MQTT notes above. | mqtt://localhost | - | No |
mqttTopic |
The mqtt topic for humidity data. Refer to MQTT notes above | "/mi_temp/LivingRoom/humidity" |
- | No |
noHumidity |
Removes Humidity information from the device. | true | false | No |
noHistory |
Removes the Eve temperature and humidity history service from this accessory. Refer to History notes. | true | false | No |
tempSourceUnits |
Set this to F if your temperature source (not Broadlink) uses fahrenheit. |
F | C | No |
"data" key-value object
| key | description |
|---|---|
heat |
Options and data values to support heat mode operation. See below for details. |
cool |
Options and data values to support heat mode operation. See below for details. |
"heat" / "cool" key-value object
| key | description |
|---|---|
on |
A hex code string or object to be sent when the heatercooler is asked to be turned on. - Required |
off |
A hex code string or object to be sent when the heatercooler is asked to be turned off. - Required |
temperatureCodes |
The configuration options for each temperature. See below for details. |
"temperatureCodes" key-value object
Each value should be the required temperature. Options/values within that can include either a hex code string or object or any of the below options.
| key | description |
|---|---|
rotationSpeedX |
A hex code string or object to set rotation speed of device to X at the corresponding temperature e.g. rotationSpeed50 |
swingOn |
A hex code string or object to to turn on swing. |
swingOff |
A hex code string or object to turn off swing. |
swingDnd |
A hex code string or object to set without changing the current swing mode of device. |
swingToggle |
A hex code string or object to toggle swing mode. |
FAQ
- At least one of heat or cool object should be present else the device will not be configured and cause an error.
minTemperatureandmaxTemperatureare required if device has temperatureCodes- This accessory supports combined hex codes for temperature, fan speed and rotation. Please check the config-sample.json file for more details and examples.
- Swing operation can be supported by providing
swingOnandswingOffORswingToggleandswingDnd.
For more details on how to configure a heater-cooler accessory please review the documentation here and review config-sample.json for sample configurations.
humidifier-dehumidifier
Example
{
      ...
      "name": "Example Humidifer/Dehumidifer",
      "type": "humidifier-dehumidifier",
      "data": {
      "on": "ON_HEX_CODE",
      "off":"OFF_HEX_CODE",
      "targetStateHumidifier":"HUMIDIFER_HEX_CODE",
      "targetStateDehumidifier":"DEHUMIDIFER_HEX_CODE",
      "swingToggle":"SWING_HEX_CODE",
      "fanSpeed20":"FAN20_HEX_CODE",
      "fanSpeed60":"FAN60_HEX_CODE",
      "fanSpeed100":"FAN100_HEX_CODE"
    }
      ...
    }
Adds a humidifier/dehumidifer accessory.
| key | description | example | default | required |
|---|---|---|---|---|
deHumidifierOnly |
Sets the device to only run in Dehumidifer mode | true | false | No |
humidifierOnly |
Sets the device to only run in Humidifer mode | true | false | No |
showLockPhysicalControls |
Set whether lock options are available | false | true | No |
threshold |
Sets how close to the target humidity the device should try to get | 2 | 5 | No |
noHumidity |
Removes Humidity information from the device. | true | false | No |
humidityAdjustment |
An adjustment value to tune the value from the value the broadlink returns | -5 | 0 | No |
humidityFilePath |
path to a local file that Humidity readings can come from | /var/tmp/humidity.txt | - | No |
mqttURL |
The URL to monitor for MQTT topics (below). Must be prefixed with mqtt://. Refer to MQTT notes above. | mqtt://localhost | - | No |
mqttTopic |
The mqtt topic for humidity data. Refer to MQTT notes above | "/mi_temp/LivingRoom/humidity" |
- | No |
data |
See Below | |||
noHistory |
Removes the Eve temperature and humidity history service from this accessory. Refer to History notes above. | true | false | No |
tempSourceUnits |
Set this to F if your temperature source (not Broadlink) uses fahrenheit. |
F | C | No |
"data" key-value object
| key | description |
|---|---|
on |
A hex code string or object to be sent when the air conditioner is asked to be turned on. |
off |
A hex code string or object to be sent when the air conditioner is asked to be turned off. |
fanOnly |
A hex code string or object to disable both Humidifer and Dehumidifier functions |
targetStateHumidifier |
A hex code string or object to set the unit to Humidifier mode |
targetStateDehumidifier |
A hex code string or object to set the unit to Dehumidifier mode |
lockControls |
A hex code string or object to lock controls |
unlockControls |
A hex code string or object to unlock controls |
swingToggle |
A hex code string or object used to toggle the swing mode on/off. |
fanSpeedX |
A hex code string where X is any fanSpeed. Hex code used
to set unit to the specified fanSpeed. fanSpeed30. |
TemperatureSensor
Example
{
      ...
      "name": "Example Thermometer",
      "type": "temperatureSensor",
      "mqttURL":"mqtt://localhost",
      "mqttTopic":"/mi_temp/LivingRoom/temperature"
      ...
    }
Adds a Temperature and Humidity Sensor accessory using the Broadlink device's sensors.
| key | description | example | default | required |
|---|---|---|---|---|
noHumidity |
Removes Humidity information from the device. | true | false | No |
temperatureAdjustment |
An adjustment value to tune the value from the value returned | -5 | 0 | No |
humidityAdjustment |
An adjustment value to tune the value from the value returned | -5 | 0 | No |
temperatureFilePath |
Path to a local file that Humidity readings can come from. File can contain either a single number
(interpretted as Temperature) or lines with values prefixed by temperature:,
humidity:, or battery:
|
/var/tmp/humidity.txt | - | No |
batteryAlerts |
Sets whether battery levels are monitored (using battery:XX in temperatureFilePath). Adds some HAP Characteristics errors on start-up as Battery Level is not native but supported in Eve app. Requires file or MQTT to include 'battery' field. | true | false | No |
mqttURL |
The URL to monitor for MQTT topics (below). Must be prefixed with mqtt://. Refer to MQTT notes above | mqtt://localhost | - | No |
mqttTopic |
The mqtt topic for humidity data. Refer to MQTT notes above | "/mi_temp/LivingRoom/humidity" |
- | No |
data>fanOnly |
Hex code used to disable both Humidifer and Dehumidifier functions | 0020000... | off code used if not supplied | No |
noHistory |
Removes the Eve temperature and humidity history service from this accessory. Refer to History notes above. | true | false | No |
tempSourceUnits |
Set this to F if your temperature source (not Broadlink) uses fahrenheit. |
F | C | No |
Humidity Sensor
Example
{
      ...
      "name": "Example Humidity Sensor",
      "type": "humiditySensor"
      ...
    }
Adds a humidity sensor using the Broadlink device's sensors.
| key | description | example | default | required |
|---|---|---|---|---|
humidityAdjustment |
An adjustment value to tune the value from the value the broadlink returns | -5 | 0 | No |
humidityFilePath |
Path to a local file that Humidity readings can come from. Needs to be either a single number (used as humidity) or humidity:XX battery:XX | /var/tmp/humidity.txt | - | No |
batteryAlerts |
Sets whether battery levels are monitored (using battery:XX in humidityFilePath). Adds some HAP Characteristics errors on start-up as Battery Level is not native but supported in Eve app. Requires file or MQTT to include 'battery' field. | true | false | No |
mqttURL |
The URL to monitor for MQTT topics (below). Must be prefixed with mqtt://. Refer to MQTT notes above |
mqtt://localhost | - | No |
mqttTopic |
The mqtt topic for humidity data. Refer to MQTT notes above | "/mi_temp/LivingRoom/humidity" |
- | No |
data>fanOnly |
Hex code used to disable both Humidifer and Dehumidifier functions | 0020000... | off code used if not supplied | No |
noHistory |
Removes the Eve temperature and humidity history service from this accessory. Refer to History notes above. | true | false | No |
TV
Example
{
      ...
      "name": "Example TV",
      "type": "tv",
      "data": {
        "on":"ON_HEX_CODE",
        "off":"OFF_HEX_CODE",
        "remote": {
          "select":"SELECT_HEX_CODE",
          "arrowUp":"UP_HEX_CODE",
          "arrowDown":"DOWN_HEX_CODE",
          "arrowLeft":"LEFT_HEX_CODE",
          "arrowRight":"RIGHT_HEX_CODE",
          "playPause":"PAUSE_HEX_CODE"
        }
        "volume": {
          "up":"VOLUP_HEX_CODE",
          "down":"VOLDOWN_HEX_CODE"
        }
        "inputs": [{
          "name":"INPUT 1",
          "type":"hdmi",
          "data":"HEX_CODE"
        }
       }
    ...
    }
Adds TV Accessories.
| key | description | example | default | required |
|---|---|---|---|---|
enableAutoOff |
Turn the TV off automatically when onDuration has been reached. | true | false | No |
onDuration |
The amount of time before the TV automatically turns itself off (used in conjunction with enableAutoOff). | 5 | 60 | No |
enableAutoOn |
Turn the TV on automatically when offDuration has been reached. | true | false | No |
offDuration |
The amount of time before the TV automatically turns itself on (used in conjunction with enableAutoOff). | 5 | 60 | No |
pingIPAddress |
When an IP address is provided, it is pinged every second. If a response is received then the TV turns on, otherwise it turns off. | "192.168.1.77" | - | No |
pingUseArp |
When set ARP lookups are used to validate the device's status instead of an ICMP ping. | true | false | No |
pingIPAddressStateOnly |
Using this option will prevent the hex code from being sent when the state changes. | true | false | No |
pingFrequency |
The frequency in seconds that the IP address should be pinged. | 5 | 1 | No |
pingGrace |
Pauses ping status changes for the specified period (seconds) to allow device to start-up/shutdown after the change. | 15 | 10 | No |
subType |
Updates the icon in Home to either TV, STB, Stick, or Receiver. | stb | tv | No |
data |
see below. |
"data" key-value object
| key | description |
|---|---|
on |
A hex code string or object to be sent when the tv is powered on. |
off |
A hex code string or object to be sent when the tv is powered off. |
volume |
see below. |
inputs |
see below. |
remote |
see below. |
"volume" key-value object
| key | description |
|---|---|
up |
A hex code string or object to be sent to turn the TV volume up. |
down |
A hex code string or object to be sent to turn the TV volume down. |
"inputs" key-value object
| key | description |
|---|---|
name |
The name used for the mode, shown in the GUI. |
type |
One of the follow to represent the mode: 'other','home_screen','tuner','hdmi','composite_video','s_video','component_video','dvi','airplay','usb','application'. |
data |
A hex code string or object to be sent to switch the TV to the selected input. |
"remote" key-value object
| key | description |
|---|---|
rewind |
A hex code string or object for this button function |
fastForward |
A hex code string or object for this button function |
nextTrack |
A hex code string or object for this button function |
previousTrack |
A hex code string or object for this button function |
arrowUp |
A hex code string or object for this button function |
arrowDown |
A hex code string or object for this button function |
arrowLeft |
A hex code string or object for this button function |
arrowRight |
A hex code string or object for this button function |
select |
A hex code string or object for this button function |
back |
A hex code string or object for this button function |
exit |
A hex code string or object for this button function |
playPause |
A hex code string or object for this button function |
info |
A hex code string or object for this button function |
learn-code
Example
      {
      ...
      "name": "RF Scan",
      "type": "learn-code",
      "scanFrequency": true
      ...
    }
You do not need to add this accessory type yourself as we add one automatically. However if you have
multiple Broadlink RM devices then it may be useful to specify multiple devices with the learn-code type
along with a "host" value so that you can learn from each of them.
| key | description | example | default | required |
|---|---|---|---|---|
enableAutoOff |
Allows the learn-code accessory to turn off automatically after a given amount of time or when a hex code has been received. | false | true | No |
onDuration |
The amount of time before the switch automatically turns itself off (used in conjunction with
enableAutoOff).
|
5 | 60 | No |
scanFrequency |
This changes the type of learning to be the same as the default "Scan Frequency" | true | false | No |
Troubleshooting
If nothing on this site is able to help you, try reaching out the the community for help. I recommend either Reddit or GitHub are usually the best places.
Homebridge Config Location
Generally the plugin can find where your config.json lives as it commonly sits in the
/var/lib/homebridge directory, or the .homebridge directory of your user account. If
you're
doing something out of the ordinary however you may need to override this. You can do so by adding a
"homebridgeDirectory": "/path/to/config.json key/value pair to the platform config.
Config File Parsing
You'll likely encounter an error at some point saying There was a problem reading your config.json file.
Please try pasting your config.json file here to validate it: http://jsonlint.com. The site
http://jsonlint.com is a great resource. Take the advice and
copy/paste your config
there and it'll help you locate where you've gone wrong.
There are a lot of people here who have never seen config files like these before, so here's a quick tip; when you have the option of putting true or false as a value, do not put quotation marks around it. e.g. { example: false } not { example: "false" }.
Tip: The config files are case sensitive so make sure you're copying things exactly.
Device Failure Detection Permissions
The plugin uses ping to detect if a device drops off the network. Recent changes to the ping module require additional node permissions. If this is an issue you'll see a message like this in the logs on start up:
[Broadlink RM] Broadlink RM won't detect device failures due to a permissions issues with "net-ping".

        To fix:

        1. Run "which node" to determine your node path.

        2. Run "sudo setcap cap_net_raw+ep /path/to/node".

        Note: Replacing /path/to/node with the path you found in the first step.
To fix this, follow the steps as outlined:
- Run
which nodeand note the result. - Run
sudo setcap cap_net_raw+ep /path/to/nodereplacing /path/to/node with the path noted above.
If this fails with an error The value of the capability argument is not permitted for a file. Or the file is not a
regular (non-symlink) file run ls -al /path/to/node and the result will give you the actual
location of node.
Repeat step 2 above using this new value.
Version 4.3.1+ notes
There are a couple of changes made in version 4.3.1 which might cause issues when you upgrade.
- There was a bug in how MAC addresses were stored in the plugin. If you specify a HOST in your config.json by MAC address, you'll likely need to correct this value after you update.
- In order to fix an issue in iOS 14, all TVs are now seperate accessories. Previously the first TV connected via Homebridge as a bridge. This means that after updating, that first TV will need to be removed and re-added to HomeKit.
- The Dehumidifer accessory has been updated to use the Humidity readings from your Broadlink device. If your Broadlink device doesn't support Humidity readings, or you don't want to functionality set `"noHumidity" : true` in your config.json
Known issue with 315MHz Scan
Unforuntately there is an issue at the moment with Learning some RF codes. This seems to be impacting 315 MHz remotes, but may be others too. There are a couple of options to workaround this issue:
- This plugin supports Pronto codes. If you're extremely lucky you may find codes in online databases that can be used.
- The python based project python-broadlink works well. Try using this tool to learn the codes. @chasenicholl's notes here may help.
- If you're able to leard the codes in the Broadlink app, you can extract the code from a backup of your device. @booshtukka has some notes here.
Special Thanks
Thanks to @tattn, @PJCzx and @momodalo whose time and effort got @lprhodes started.
And of course, thanks to @lprhodes for making the project exist.